
The App
Think of The Mix Medic like a photo filter app, but for music. You drop in a song, the app analyzes it, you make small adjustments until it sounds the way you want, then you export a polished professional-sounding file.
The whole app lives on one screen. No menus to dig through, no confusing panels. Top to bottom: the visual display, the loudness meter, the sound controls, and the export button.
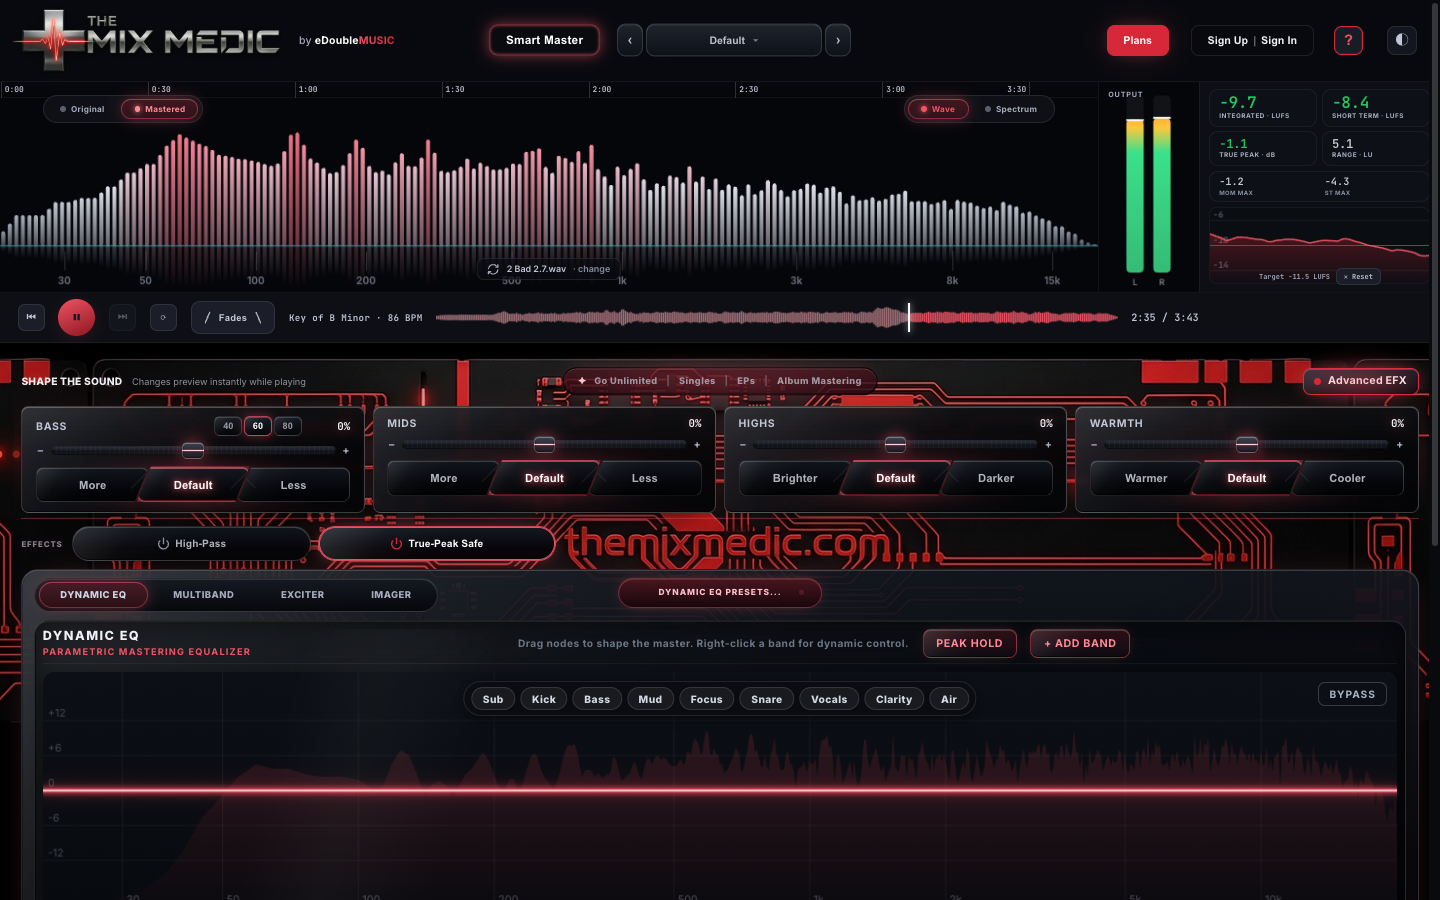
- 1Waveform Display: A picture of your song. The bumps show where the loud parts are. Press play and it turns into a live equalizer.
- 2Loudness Meter: Numbers that help you compare loudness and dynamics. Smart Master sets a track-aware starting point; use the meter without sacrificing punch.
- 3Sound Controls: Four sliders (Bass, Mid, High, Warm) that shape the tone. Simple but powerful.
- 4Transport Bar: Play, stop, compare Original vs Mastered, and export. Your home base.
- 5Export Button: When you are happy with the sound, click this to download your finished master as a high-quality file.
Get Started
Two ways to load a song: drag it straight onto the page, or click the upload area and pick a file. Works with MP3, WAV, AIFF, and FLAC. The bigger the file (like a WAV), the better the master.
The app scans the song and sets everything up automatically. The waveform appears and the meters start reading. Then you are ready to go.
- 1Drop Zone: Drag your audio file anywhere onto the page and let go. The app picks it up and loads it right away.
- 2Click to Browse: Prefer a file picker? Click here to browse your folders and select your track. Same result either way.
Compare: Original vs Mastered
The app keeps your original untouched. At any point you can flip between the original version and the mastered version with a single click. This is called A/B comparing.
This is how the pros work. You switch back and forth quickly while the music plays to hear exactly what changed. If the mastered version sounds better, great. If it sounds worse, pull back your settings. Your ears are the judge.
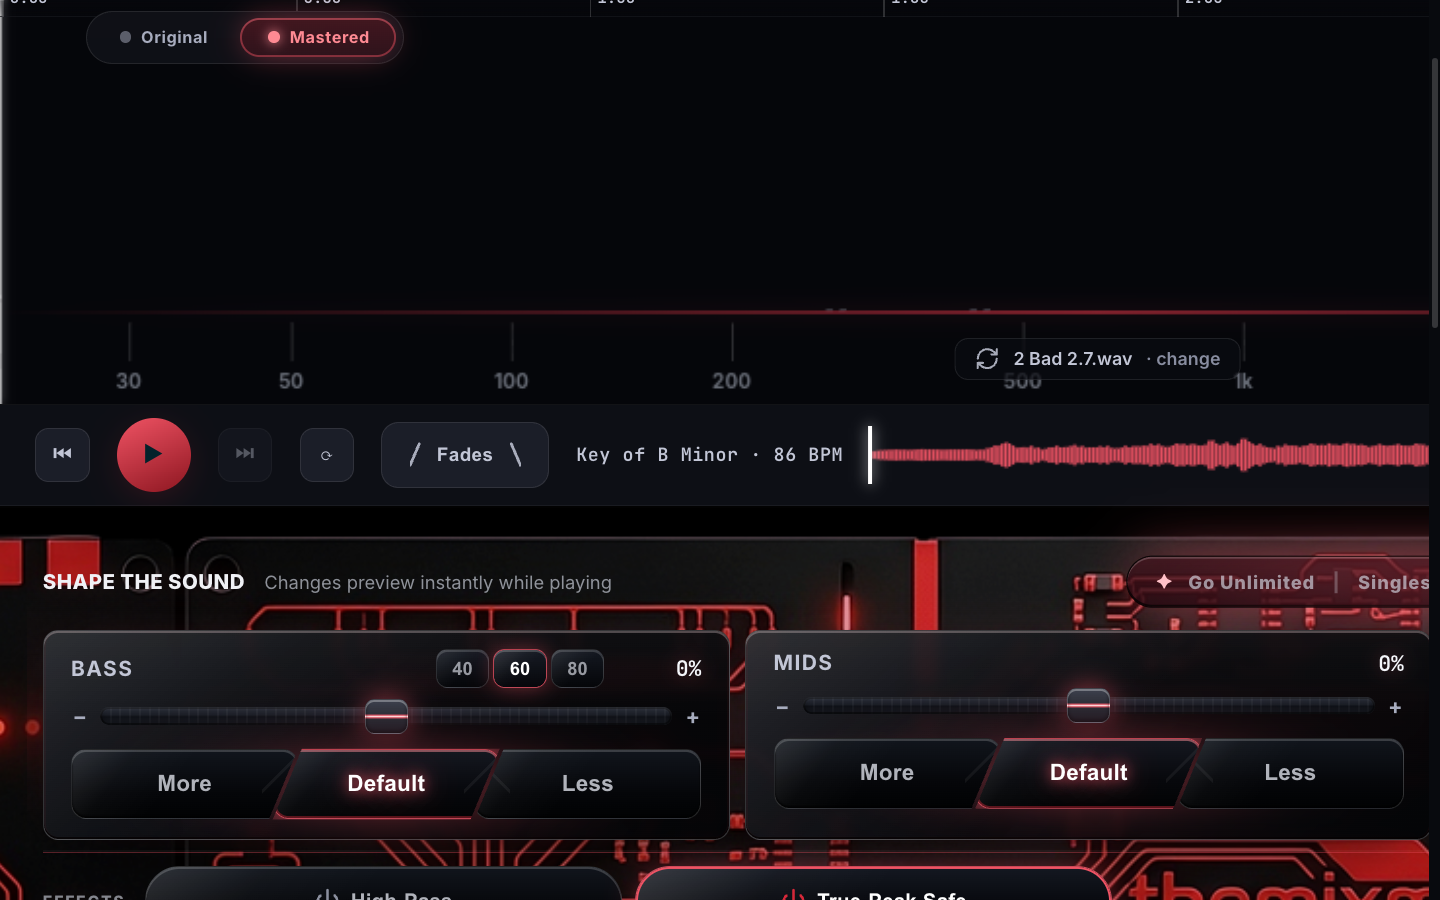
- 1Original button: Hear your song exactly as you uploaded it. No changes applied.
- 2Mastered button: Hear your song with all your settings applied. This is what will export.
- 3Playback position: Shows where you are in the song. Click or drag on the waveform scrubber to jump to any point.
- 4Smart Master button: The app analyzes your track and sets the best settings automatically. Great starting point before you tweak anything.
Loudness and Levels
Streaming services may normalize playback loudness. Many playback modes land near -14 LUFS, but targets vary by service and listener settings. A louder master is usually played back at a lower level; that alone does not remove punch. Punch is lost when limiting or compression is pushed too hard to reach a number.
The Mix Medic shows Integrated LUFS (the overall loudness of the full song) and True Peak (the highest reconstructed peak). Smart Master chooses a track-aware starting point. Contemporary full mixes often land around -10 to -12 LUFS, while dynamic or acoustic material may sit around -14 or lower. Compare at matched volume and trust the cleaner, stronger version.
- 1Integrated LUFS: The average loudness of your whole song. The useful target depends on the music and how much dynamics you want to preserve.
- 2Short Term LUFS: The loudness of the last few seconds right now. Useful for checking if the chorus is too loud or the verse too quiet.
- 3True Peak: The highest reconstructed peak in the file. Mix Medic delivers at -0.3 dBTP, which is safe for playback and keeps the level you bounced. -1.0 dBTP or lower is the more conservative choice if you want extra headroom for lossy conversion. Above 0 dBTP is clipping.
Sound Controls
These four sliders are your main tone controls. You do not need to know audio engineering to use them. Think of them like the tone knobs on a guitar amp or the EQ on your phone music app.
Each slider boosts or cuts a range of frequencies. Drag right to add more, drag left to reduce. The waveform display reacts in real time so you can see the change as you hear it.
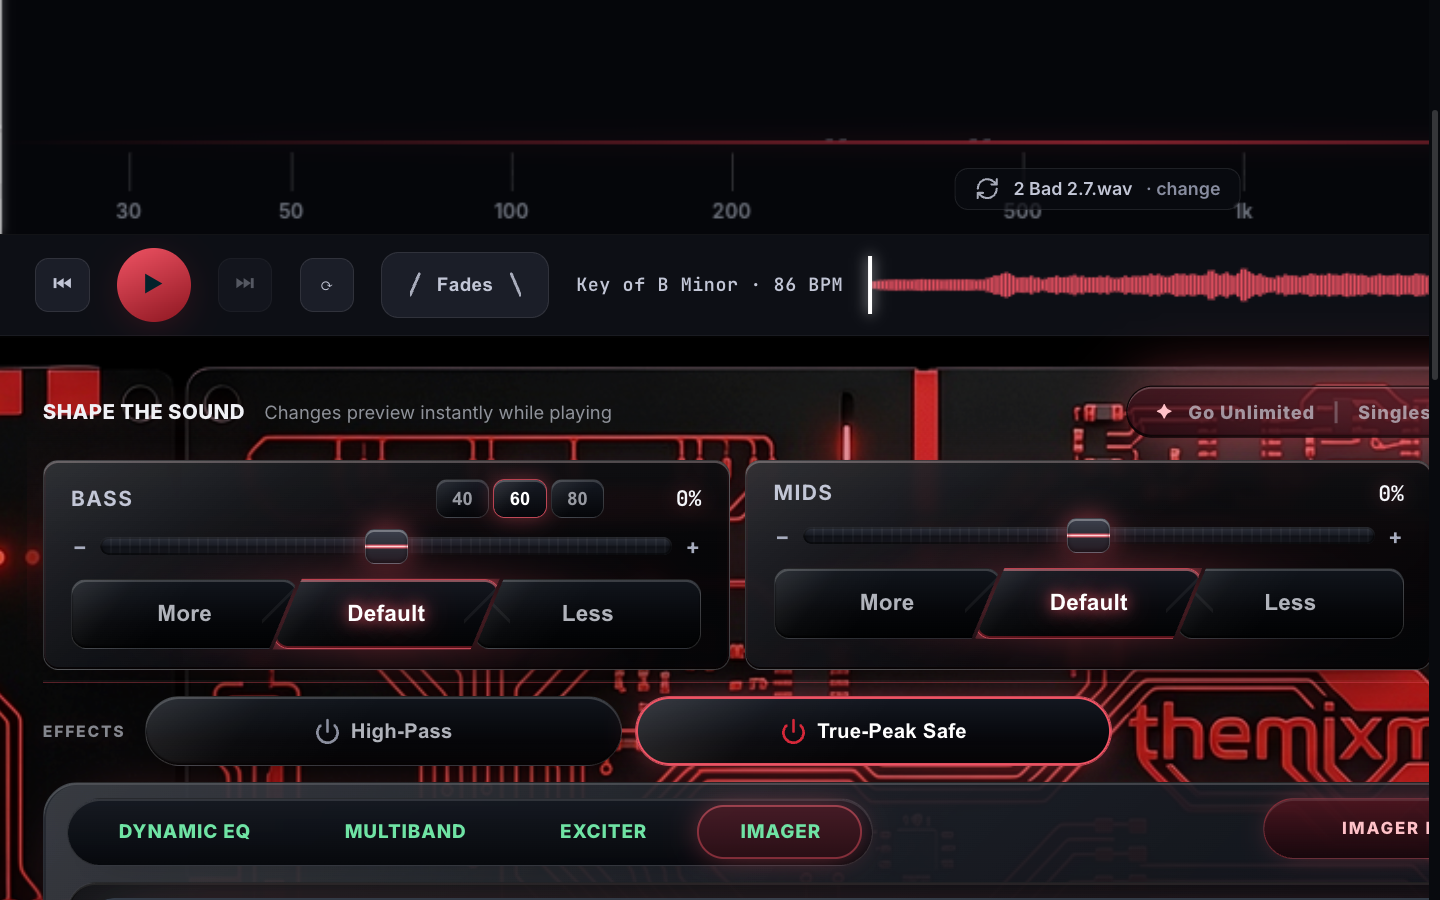
- 1Bass: Controls the low end: kick drum, bass guitar, sub frequencies. Too much and it gets muddy. Too little and the song sounds thin.
- 2Mid: Controls the middle frequencies: vocals, guitars, snare. The body of your song lives here. Cut a little if it sounds boxy or nasal.
- 3High: Controls the top end: hi-hats, presence, air. Boost for more sparkle and clarity. Cut if it sounds harsh or too bright.
- 4Warm: Adds a smooth analog-style warmth. Think vinyl records or tape. A little goes a long way. Pull back if it starts sounding muddy.
- 5Presets: Pre-built tone combinations for common styles like Hip Hop, Pop, and Rock. Great starting point. You can tweak after applying one.
Advanced EFX
Click "Advanced" to open the plugin rack. Four tabs appear: Para EQ, Multiband, Exciter, and Imager. These give you deeper control than the basic sliders. You do not need to use them on every song. Try them when you want to fix something specific or push the sound further.
Each plugin has a bypass button so you can flip it on and off while the song plays. Use this to check if it is actually helping before you commit to it.
Para EQ
A surgical equalizer. Find problem frequencies and fix them precisely.
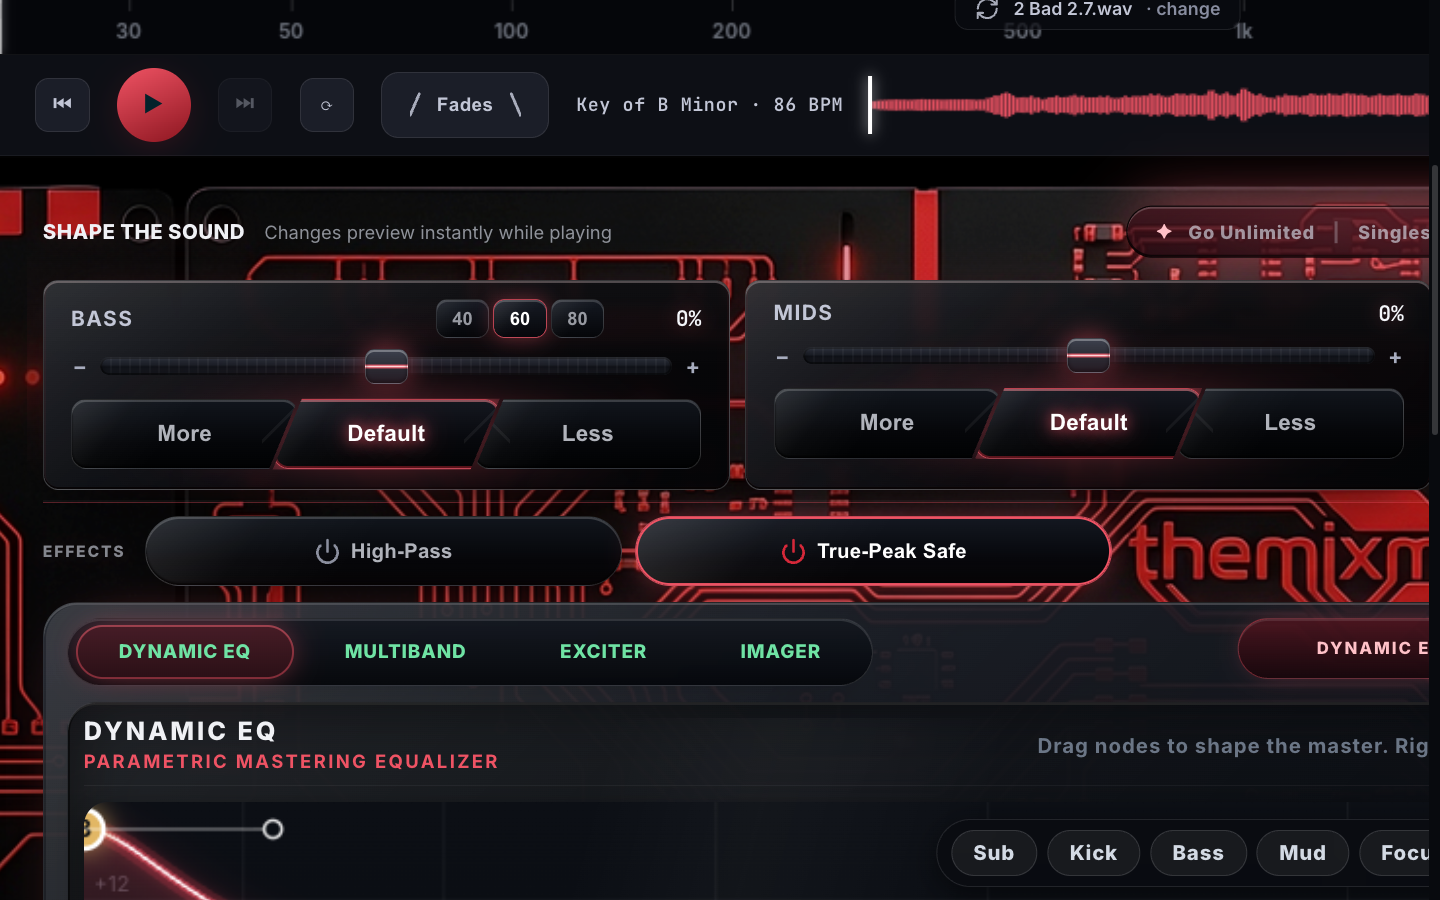
- 1Frequency nodes: Each numbered dot on the EQ curve is a control point. Drag up to boost that frequency, drag down to cut. Right-click for shape options (shelf, peak, notch).
- 2Live FFT spectrum: The colored background shows the actual frequency content of your song in real time. Bright areas are where the energy is. Use this to spot problem spots.
- 3Node detail: Hover or click any node to see its exact frequency, gain amount, and Q value (how wide or narrow the cut or boost is).
- 4Bypass toggle: Turn the whole EQ on or off to compare with and without. Click it while the song plays to hear the difference instantly.
Multiband
A compressor that works on each frequency range separately. Great for controlling a boomy bass without touching the highs.
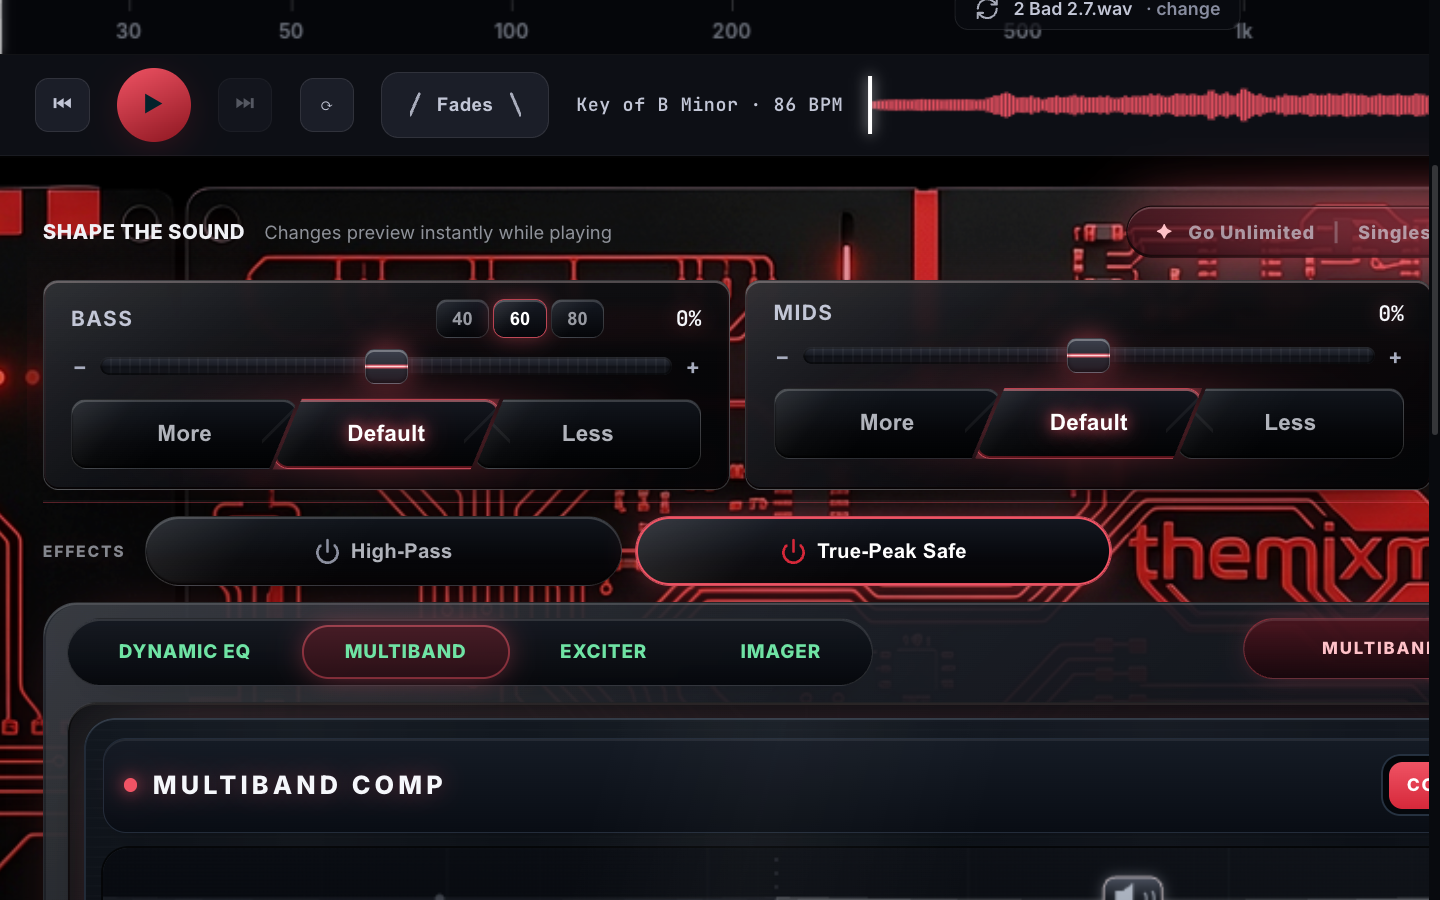
- 1Crossover lines: The vertical lines divide the sound into bands. Drag them left or right to change where each band starts and ends.
- 2Band controls: Each band has its own Threshold (how loud before it compresses) and Ratio (how much it compresses). The GR meter shows live compression activity.
- 3Gain reduction meters: Bars showing how hard each band is being compressed right now. Green is gentle, more color means it is working harder.
- 4Amount knob: Master control for the whole multiband. Turn it up to compress more, down to compress less. Start low and increase until it sounds tight and glued together.
Exciter
Adds harmonic sparkle and presence. Makes things pop without just making them louder.
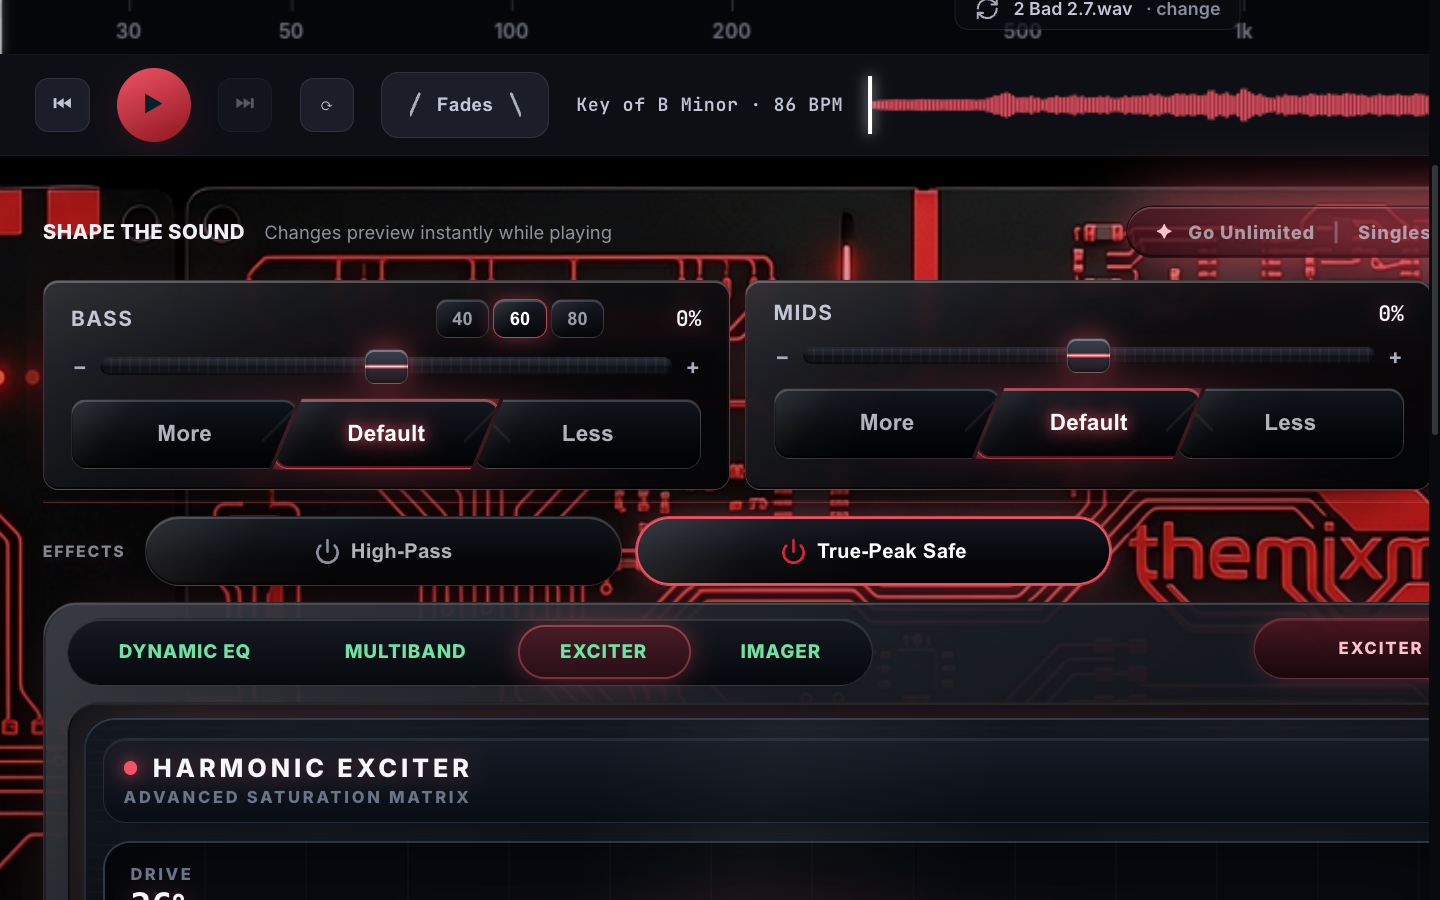
- 1Amount: How much exciter effect to add. A little is usually all you need. Too much makes things sound harsh or fizzy.
- 2Band controls: Choose which frequency ranges get the excitement. Boosting the high bands adds air and shimmer. Mid bands add presence to vocals and guitars.
Imager
Makes your song sound wider. Like the sound is coming from farther apart on each side. Think of opening a window in a small room.
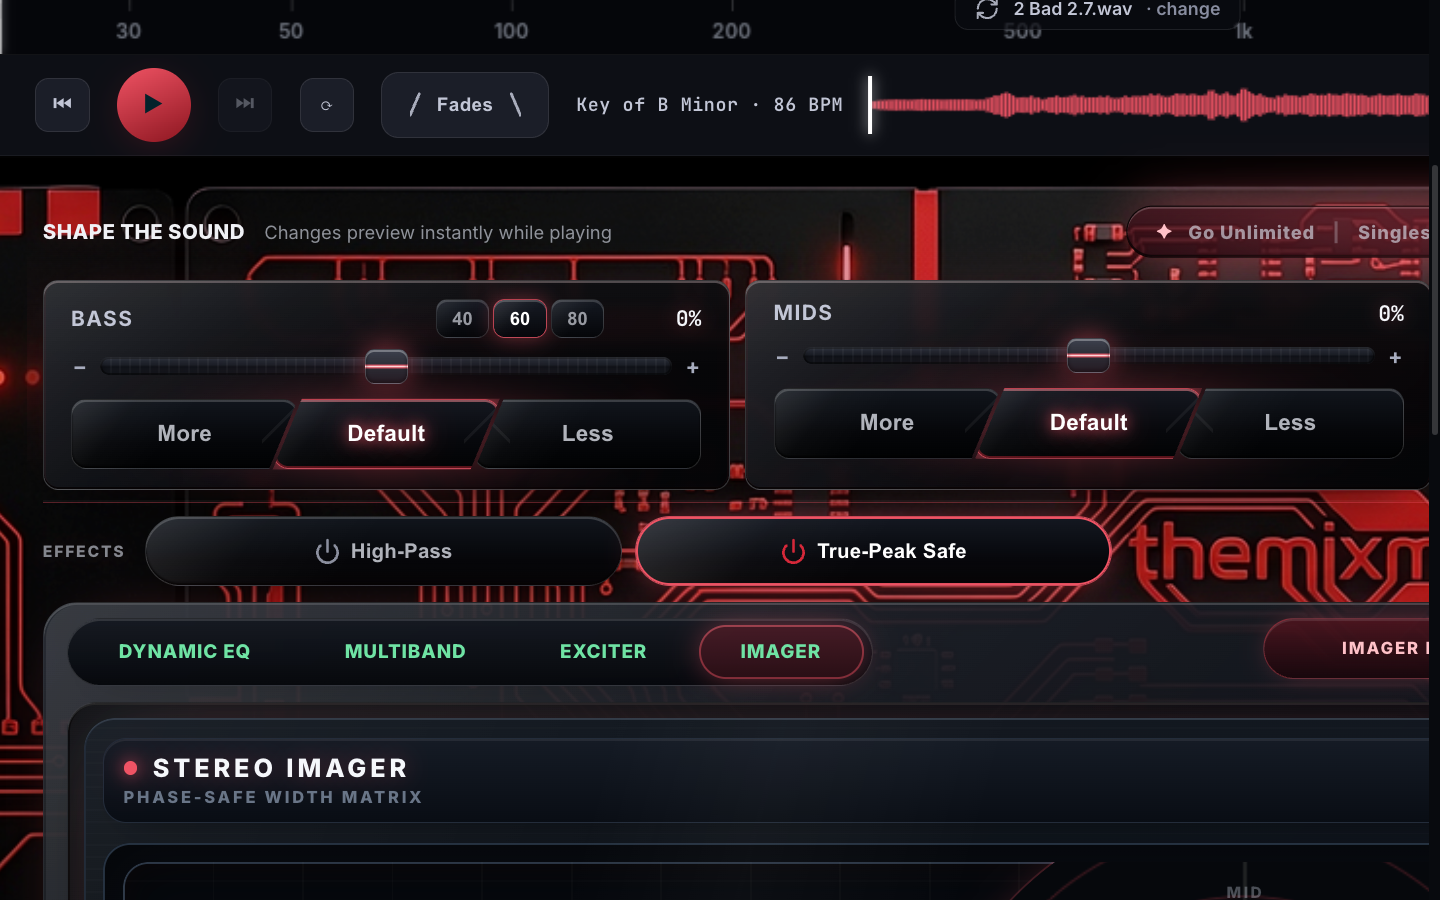
- 1Width slider: Drag right to widen the stereo image. The lows stay centered and mono-safe automatically. Great for making a mix feel more open and spacious.
- 2Goniometer: The visual display shows the stereo field. A narrow vertical line means the sound is mostly mono. A wide fan shape means it is spread out in stereo.
- 3Stereo field status: Shows MONO SAFE, WIDE, VERY WIDE, or WATCH PHASE. If it says WATCH PHASE, pull the width back a little to avoid phase problems on mono speakers.
Playlist
The playlist lets you load multiple songs at once. This is useful for EPs, albums, or any time you want to master a set of tracks with consistent settings. Load them all, master them one by one, and export each when it is ready.
Each track remembers its own settings. Switching tracks in the playlist swaps in that track's settings automatically.
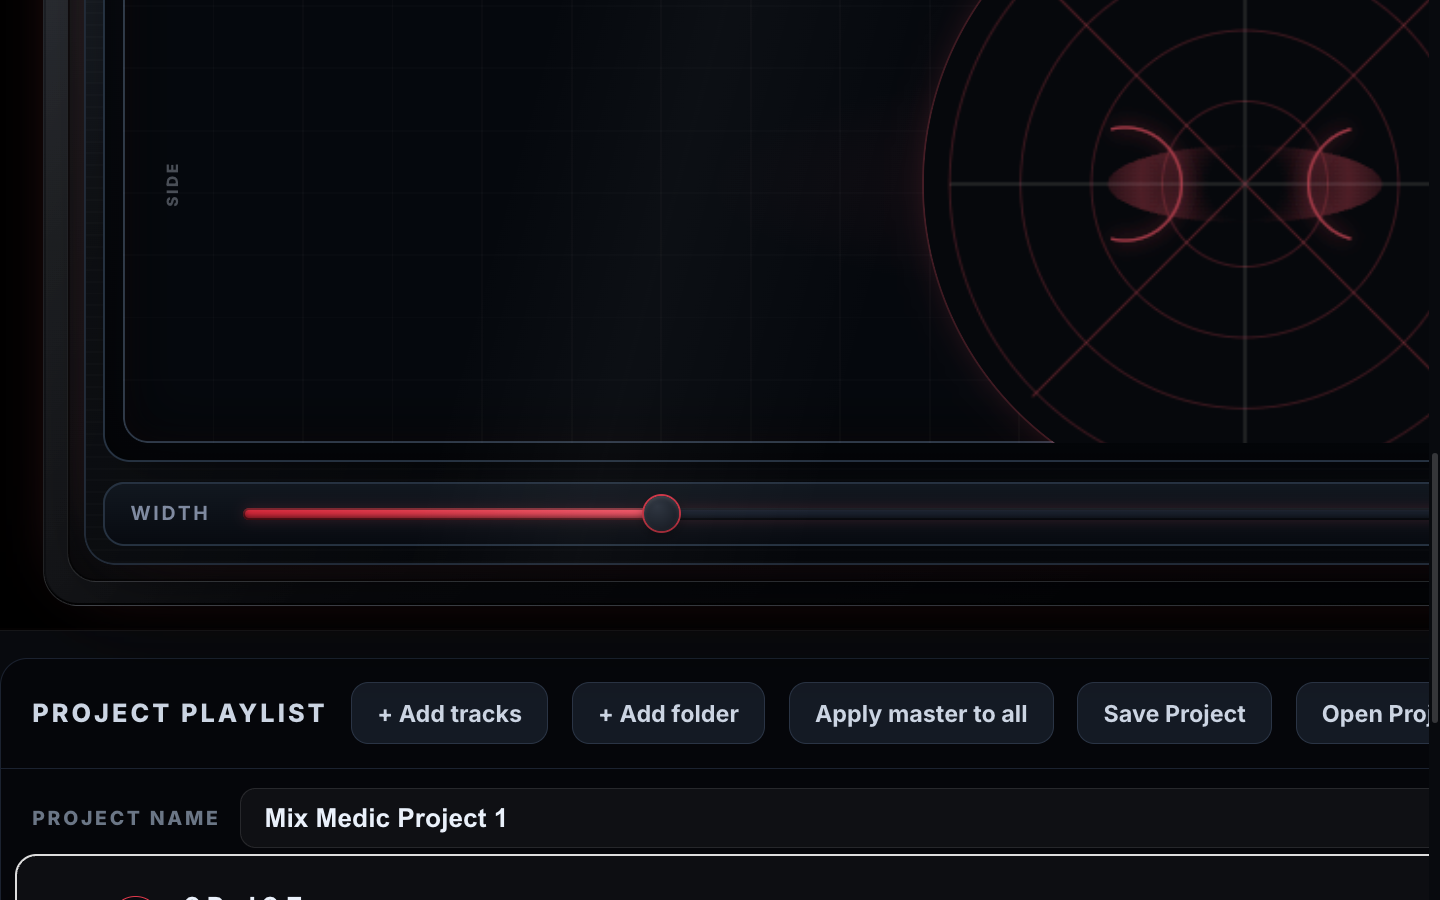
- 1Track list: All your loaded songs appear here. The currently playing track is highlighted. Click any track to switch to it.
- 2Track title: Double-click a track name to rename it. The name you type shows up on the exported file.
- 3Tame button: One click finds and reduces the harshest frequency in that track automatically. Good for quickly taming a bright or harsh mix.
- 4Add more tracks: Click the plus button to add more songs to the playlist without losing your current work.
Quick Start Guide
Drag a WAV, AIFF, MP3, or FLAC file onto the app. The waveform loads in a few seconds. The app starts analyzing your track right away.
Click the Smart Master button. This sets a solid starting point automatically. Press play and listen to the whole song once before touching anything else.
While the song plays, click Original and Mastered back and forth. Ask yourself: does the master sound better? Louder? Cleaner? If yes, keep going. If not, try a different preset.
Use Bass, Mid, High, and Warm to dial in the sound. Move one slider at a time. A/B after each change. Small moves, not big ones. You are polishing, not rebuilding.
Click Advanced and try the Imager. Drag the Width slider to around 30 to 50 percent. The song should open up and feel wider. Use Para EQ for fixing specific problem spots in the sound.
Play the full song and let the Integrated LUFS number settle. Treat Smart Master's result as a starting point, not a rule. Mix Medic holds True Peak at -0.3 dBTP for you, compare against Original at matched volume, and export the version that stays clean and punchy.
One rule to remember: Trust your ears over the numbers. The numbers tell you if your master works on streaming platforms. Your ears tell you if it sounds good. Both matter, but if you have to pick one, go with what sounds right.
Best practice: Use a song you already know really well for your first test. A track you have heard a hundred times. You will hear every change more clearly on familiar music than on something new.